2022-12-22 ASL : CM108 USB Sound Card AllStarLink Interface 만들기
ASL SVX EchoLink 2022. 12. 22. 17:04[출처]
구버젼 : https://allstarsetup.com/modify-a-cm108-sound-fob/
신버젼 : https://allstarsetup.com/modify-a-cm108-sound-fob/
LED 연결 : https://allstarsetup.com/how-to-add-indicator-leds-to-a-cm108-based-allstar-node/
국내에서는 AllStarLink 사용자가 적으나 해외에는 많이 있습니다
AllStarLink 상세 내용은 아래 사이트 참고하세요
AllStarLink.org
Re-Engineering Update #2 from the Allstarlink Board March 5th, 2021 Greetings all, This will be the final update on the system cutover performed on December 29th. On February 8th the new Allstarlink registration and node distribution system moved from deve
www.allstarlink.org
오늘은 CM108 USB Sound Card를 이용하여 VHF/UHF 무전기로 연결
개인 Repeater 만드는 법에 대해 설명하겠습니다
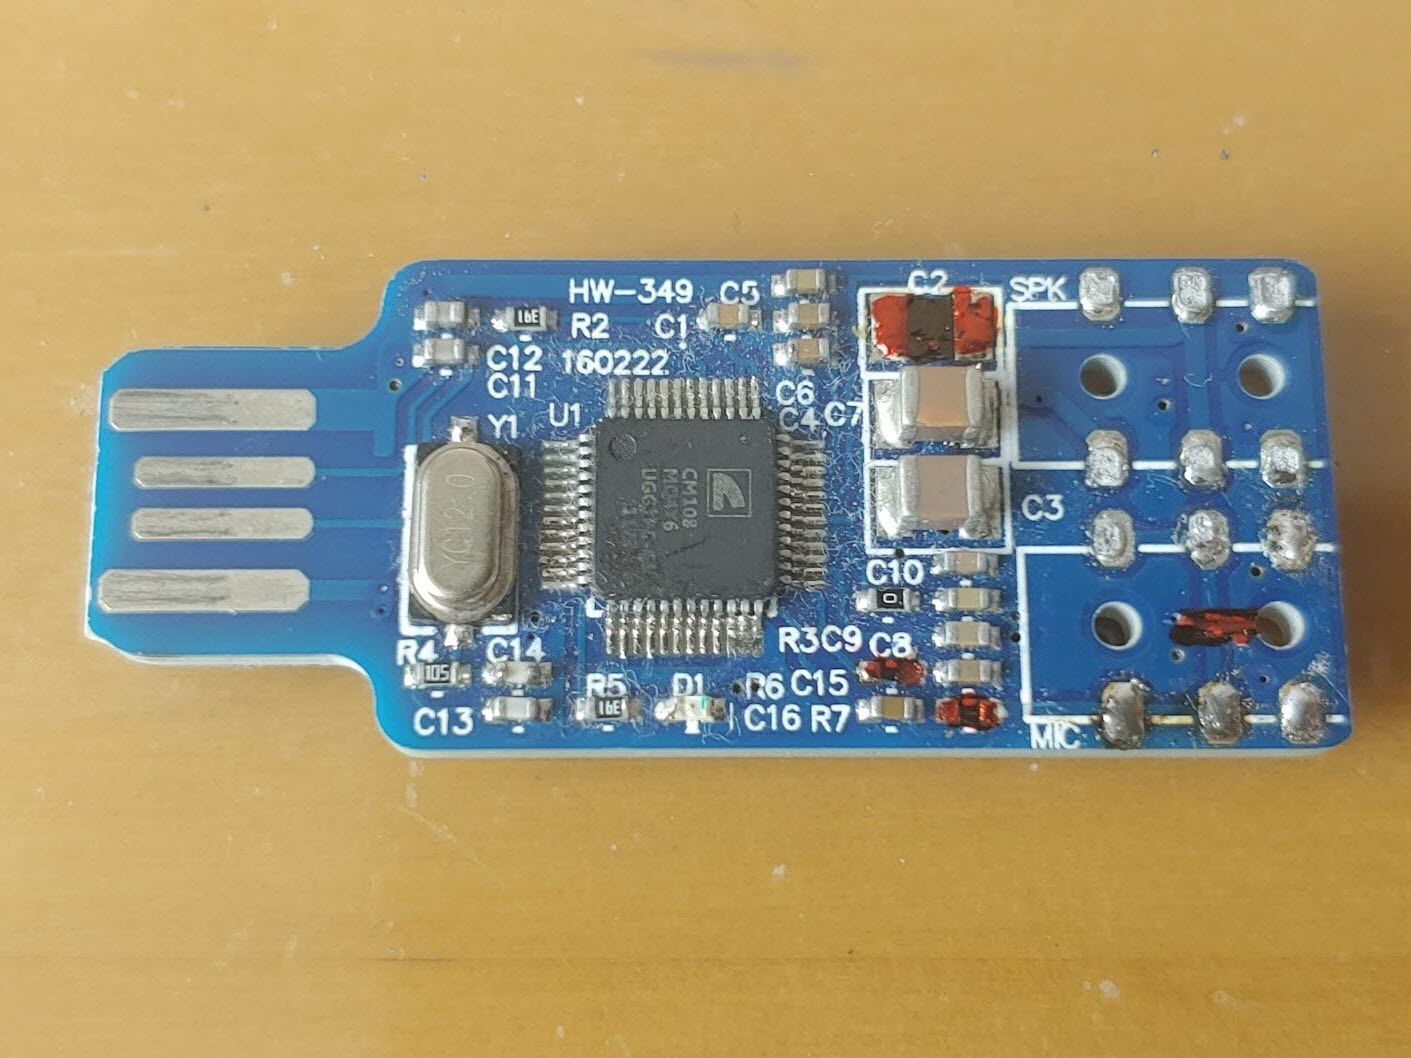
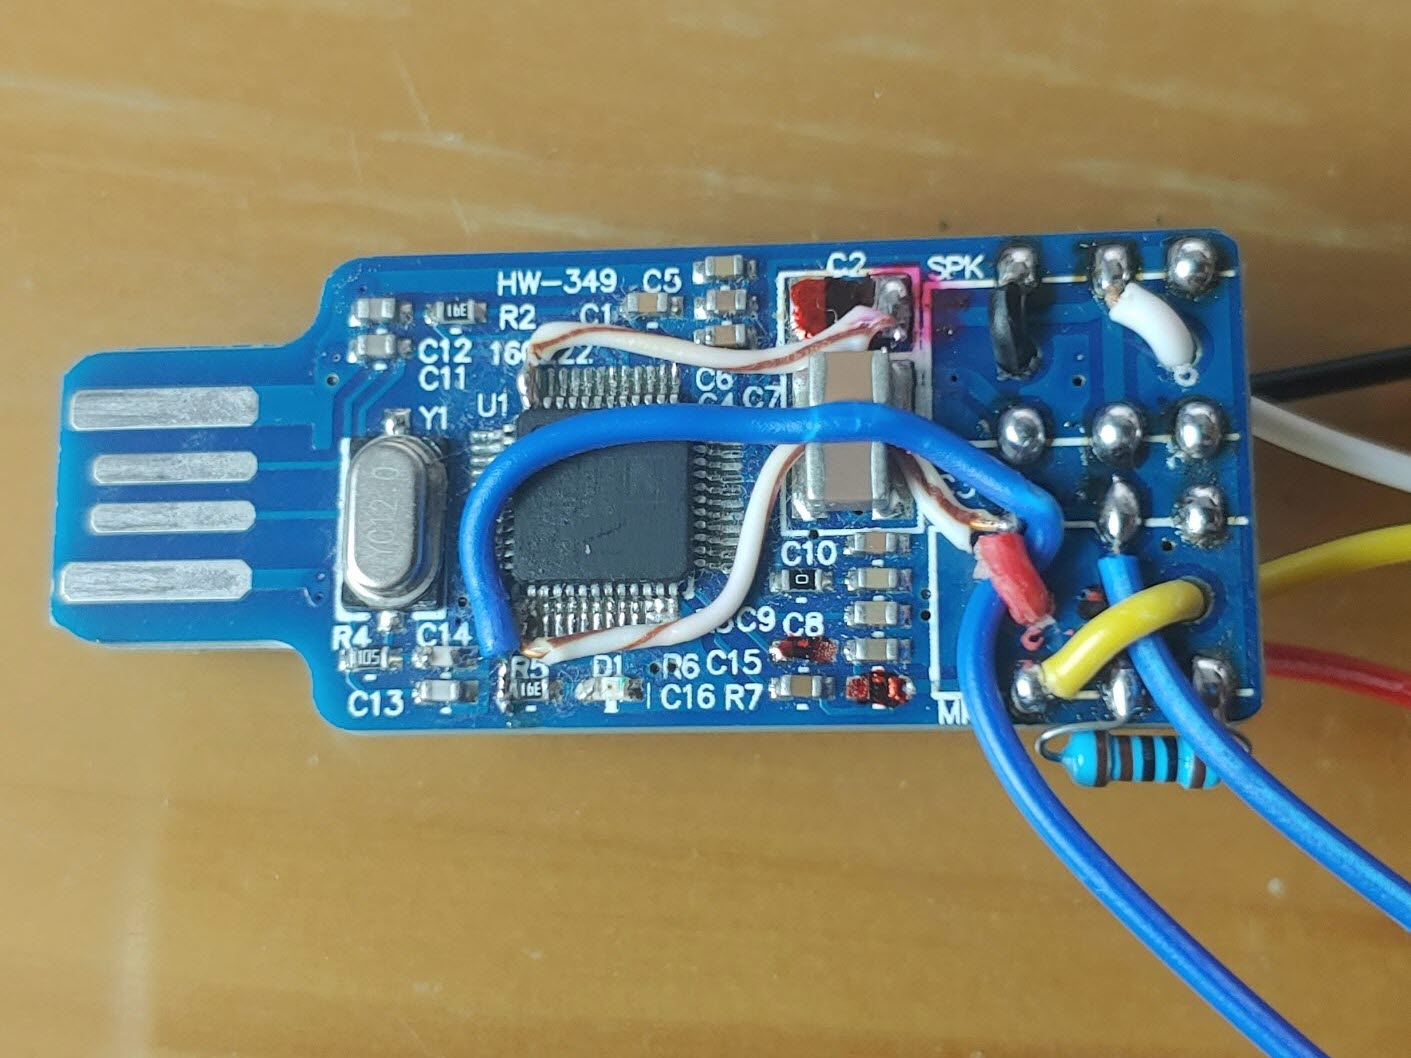
1단계] CM108 USB Sound Card 개조
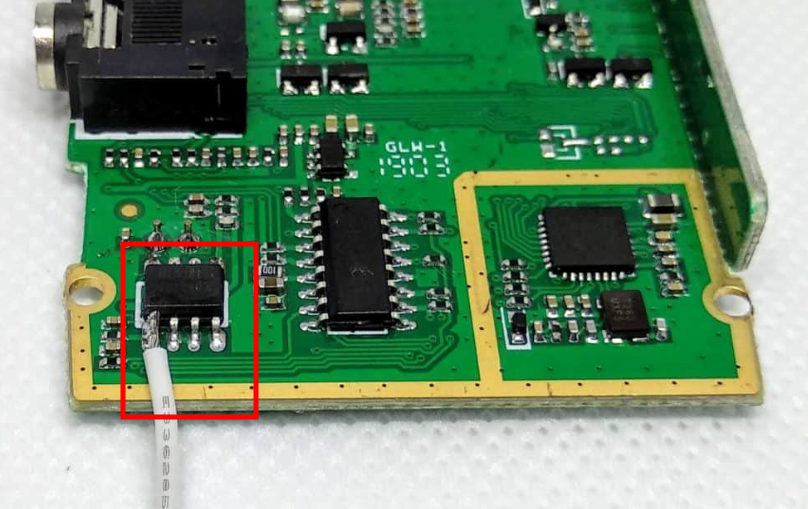
1-0] 가장 많이 사용하는 CM108 USB Sound Card 입니다

1-1] 아래 CM108 USB Sound Card에서 3.5mm Jack 두개를 제거합니다

1-2] Mic 쪽 중간 연결 회로를 칼 같은 것으로 긁어 회로를 절단하고 반드시 멀티테스터기로 절단 여부 확인하세요

1-3] 저항 2개, 콘덴서 1개를 제거합니다
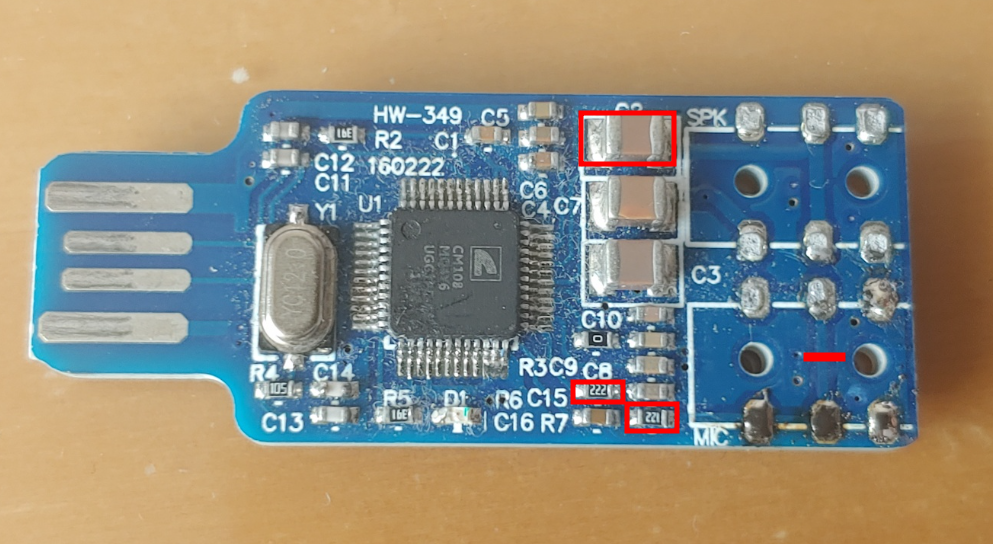
아래는 제거 후 사진입니다
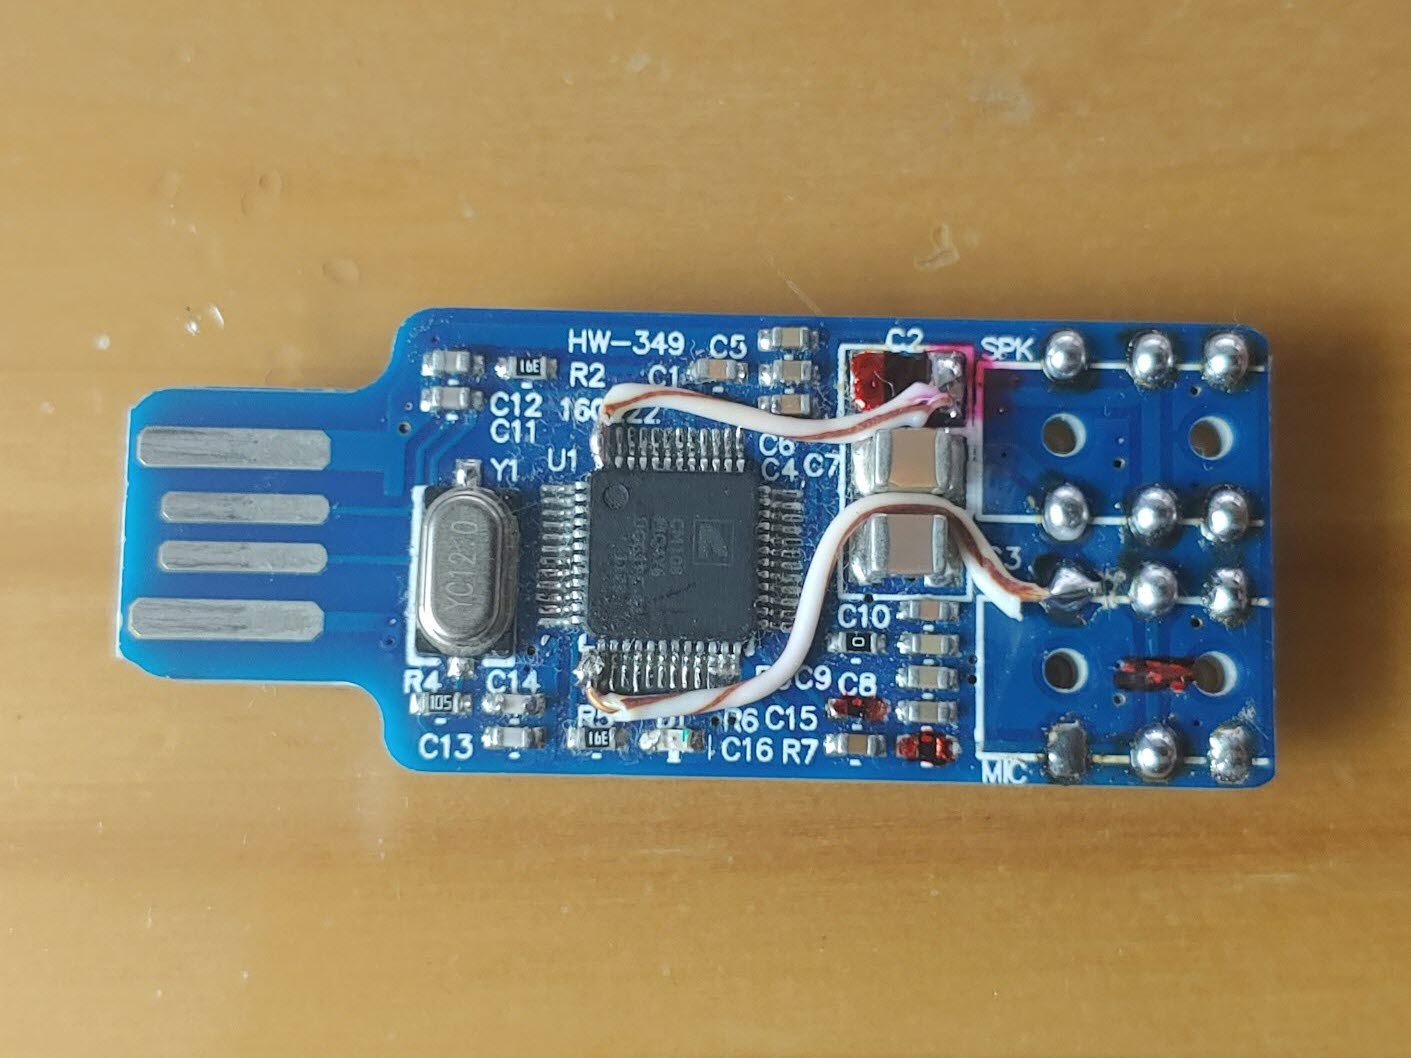
1-4] 매우 주의가 필요한 납댐입니다.
아래 선은 PTT, 위 선은 COS 신호선입니다
IC 단자 쇼트 주의 납땜 하세요
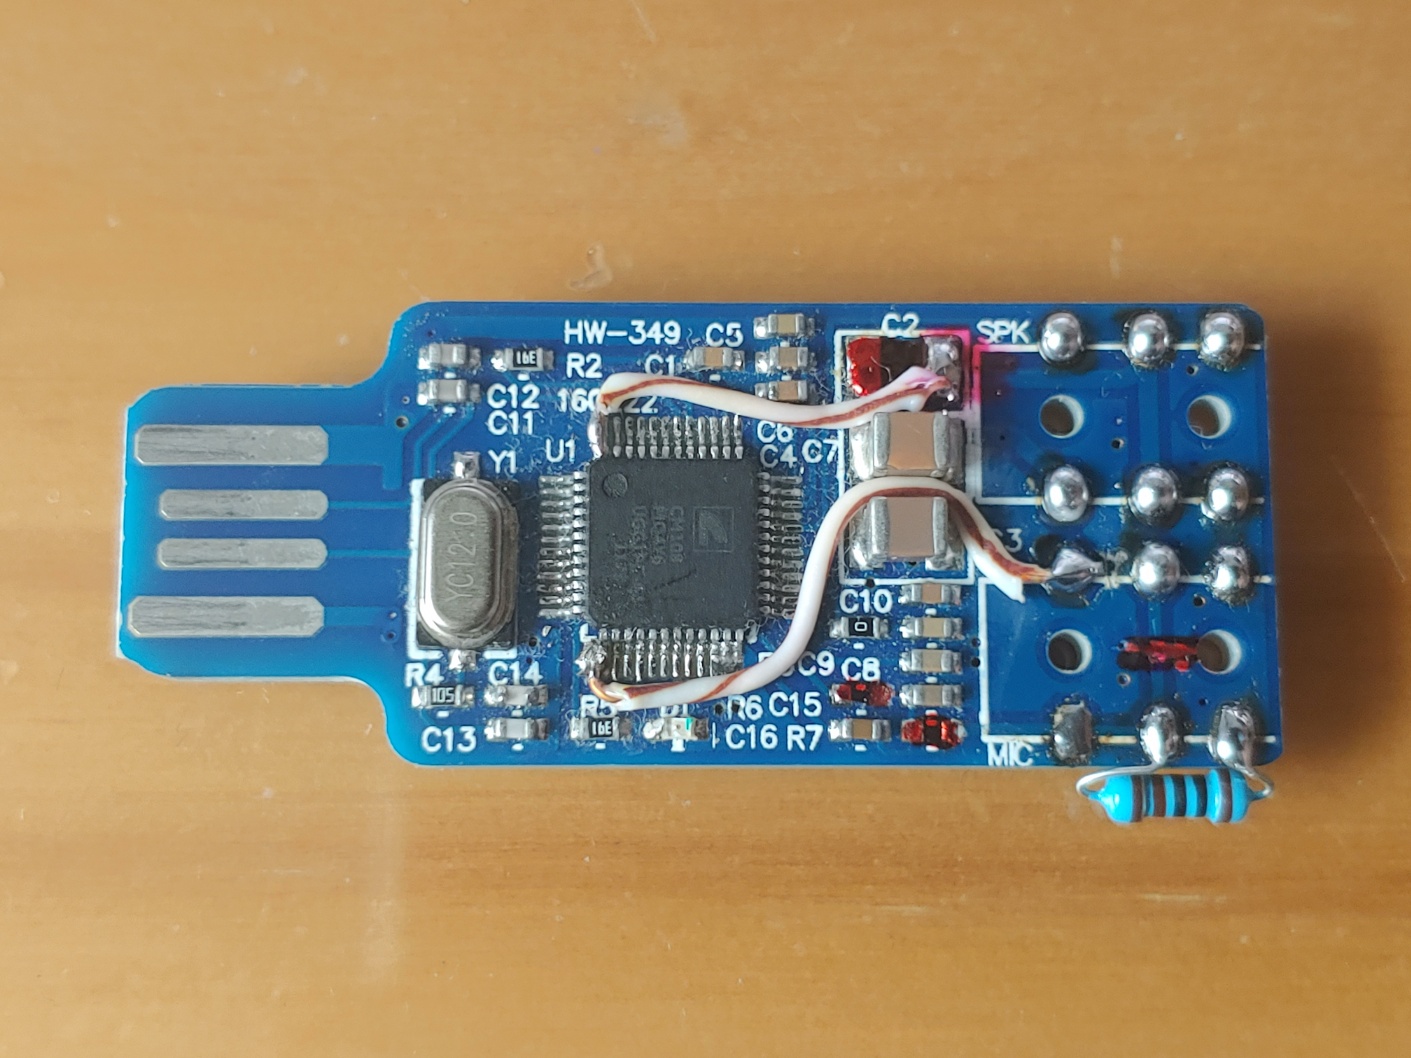
1-5] 마이크 Ring과 Sleeve 사이에 10K 저항을 연결하세요
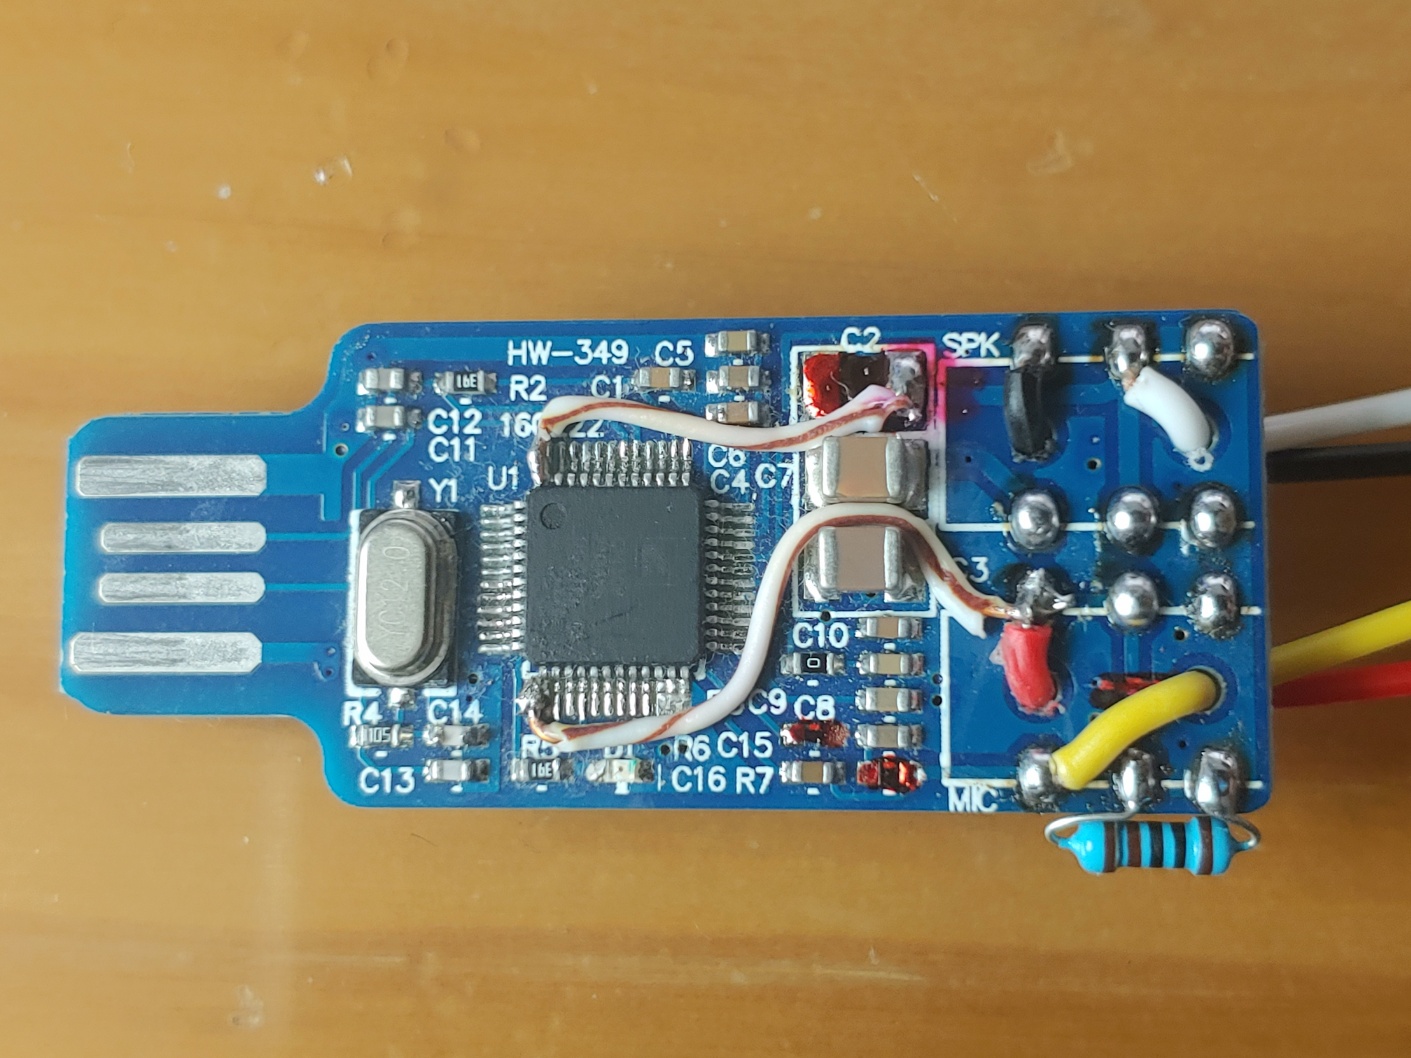
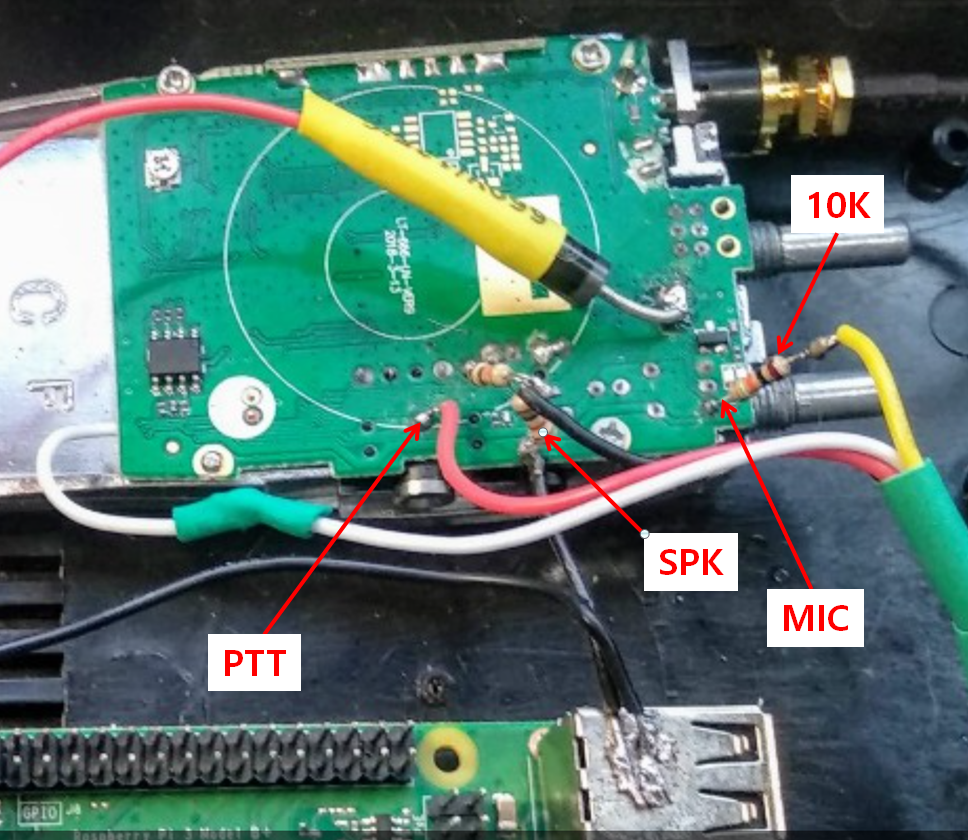
1-6] 아래 그림과 같이 4개의 선을 연결합니다
- Red : PTT
- Yellow : Mic (Rx)
- Black : Spk (Tx)
- White : COS
이 4개의 선은 무전기와 연결해야 합니다
아래는 후면 사진
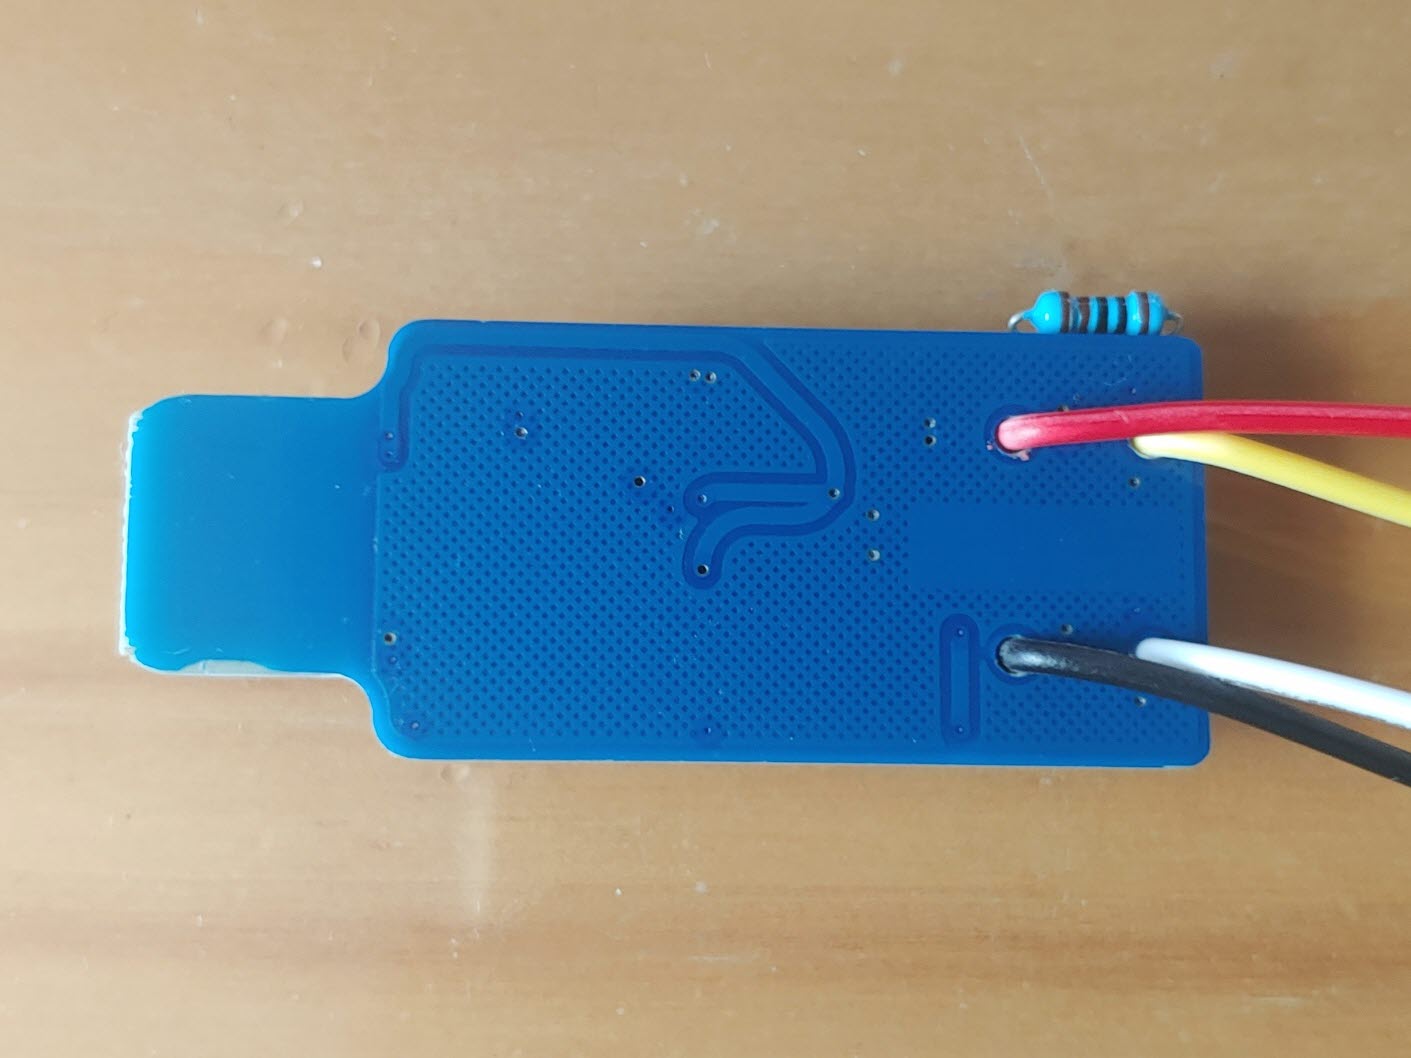
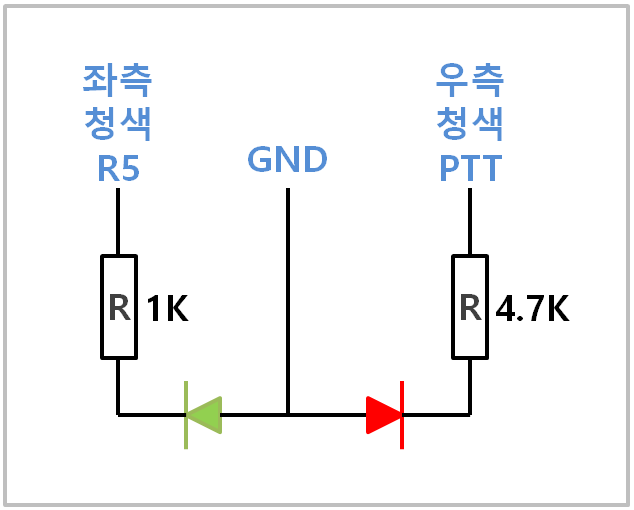
1-7] 수신, 송신 신호 LED 장착을 위해 아래와 같이 파란색 선 두개를 추가로 연결합니다
- IC Chip 아래 R5 좌측 연결 파란색 선은 깜박이는 녹색등을 연결 예정이고
- Mic 중간 파란색 선은 PTT on 적색등을 연결할 예정입니다
2단계] 무전기 연결 (예시 : Baofeng 888s 모델)
[출처] https://allstarsetup.com/modify-the-baofeng-888s-for-allstar/
Modifying a Baofeng 888s for Allstar, an illustrated guide. - allstar setup.com
How to modify a Baofeng 888s for Allstar. Actually, it is not that difficult. We have step by step instructions and much more to help you build your node.
allstarsetup.com
2-1] 아래 사진과 같이 기존 무전기의 3가지를 제거합니다
- LED
- Mic (Condenser Microphone)
- Speaker
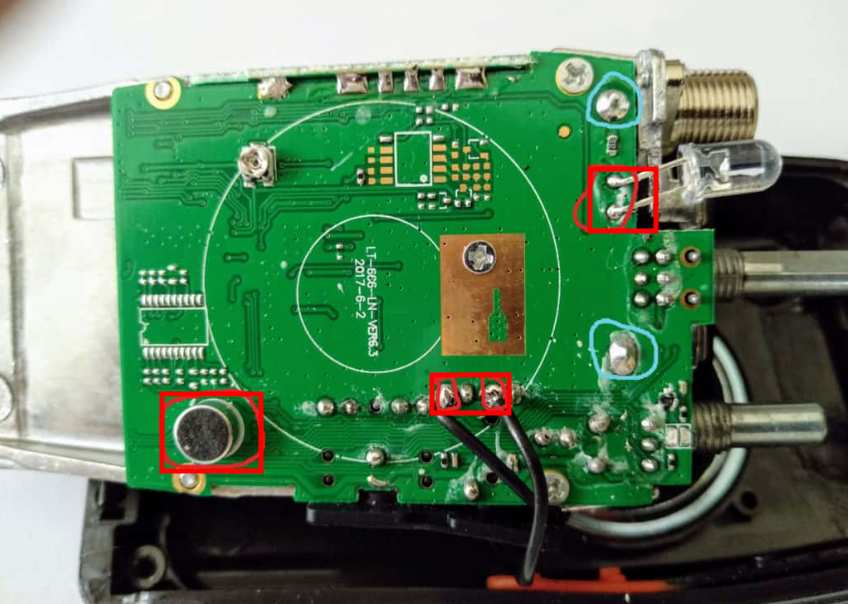
2-2] COS 선 연결
2-3] MIC, SPK, PTT 선 연결
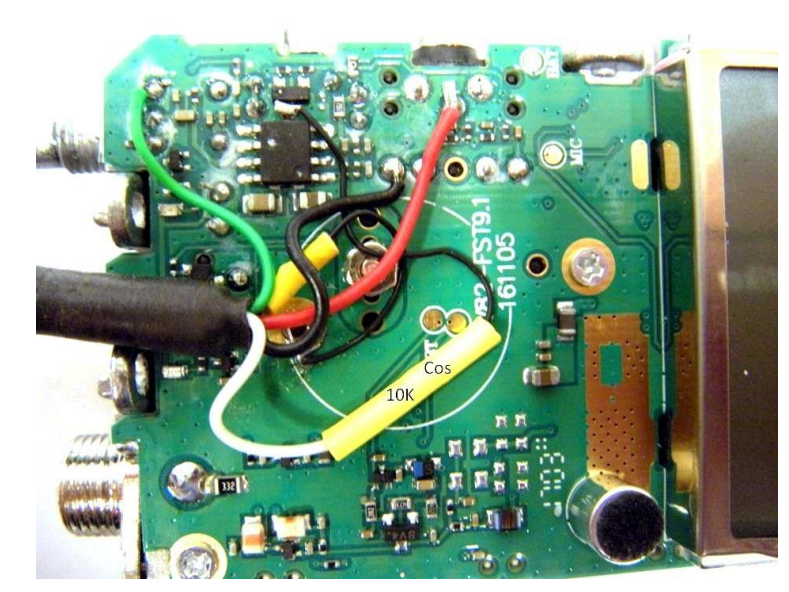
3단계] 무전기 연결 (예시 : Baofeng UV-82 모델)
3-1] 아래 도면과 같이 Rx, Tx, PTT, COS 4개 선을 연결합니다
- COS 선 연결 시 10K 1/8W 저항을 추가해주세요

3-2] 연결 후 사진
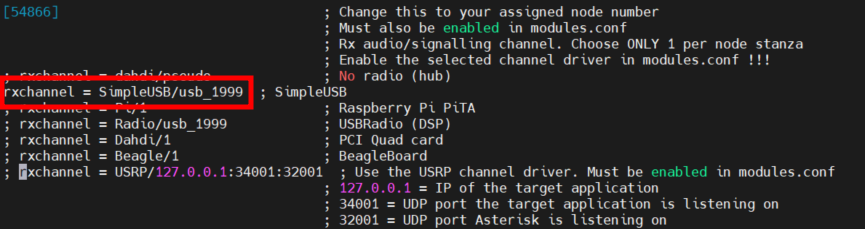
4단계] AllStarLink 설정 파일 중 rpt.conf 수정
[출처] http://www.bay-net.org/uploads/1/2/2/7/122774721/w6mnl-allstar-baycon2018.pdf
sudo nano /etc/asterisk/rpt.conf 한 후 아래와 같이 수정하세요
이상입니다
저도 무전기 Baofeng 888s와 UV82 가 없어
KENWOOD TH-7H를 가지고 테스트를 하였는데
- PTT 신호가 반대로 작동하고
- 수신부분이 작동하지 않아 (COS 연결 안되었음)
알리상회에 UV82 1개 주문하였습니다
도착하면 추가 정리하여 공유하도록 하겠습니다
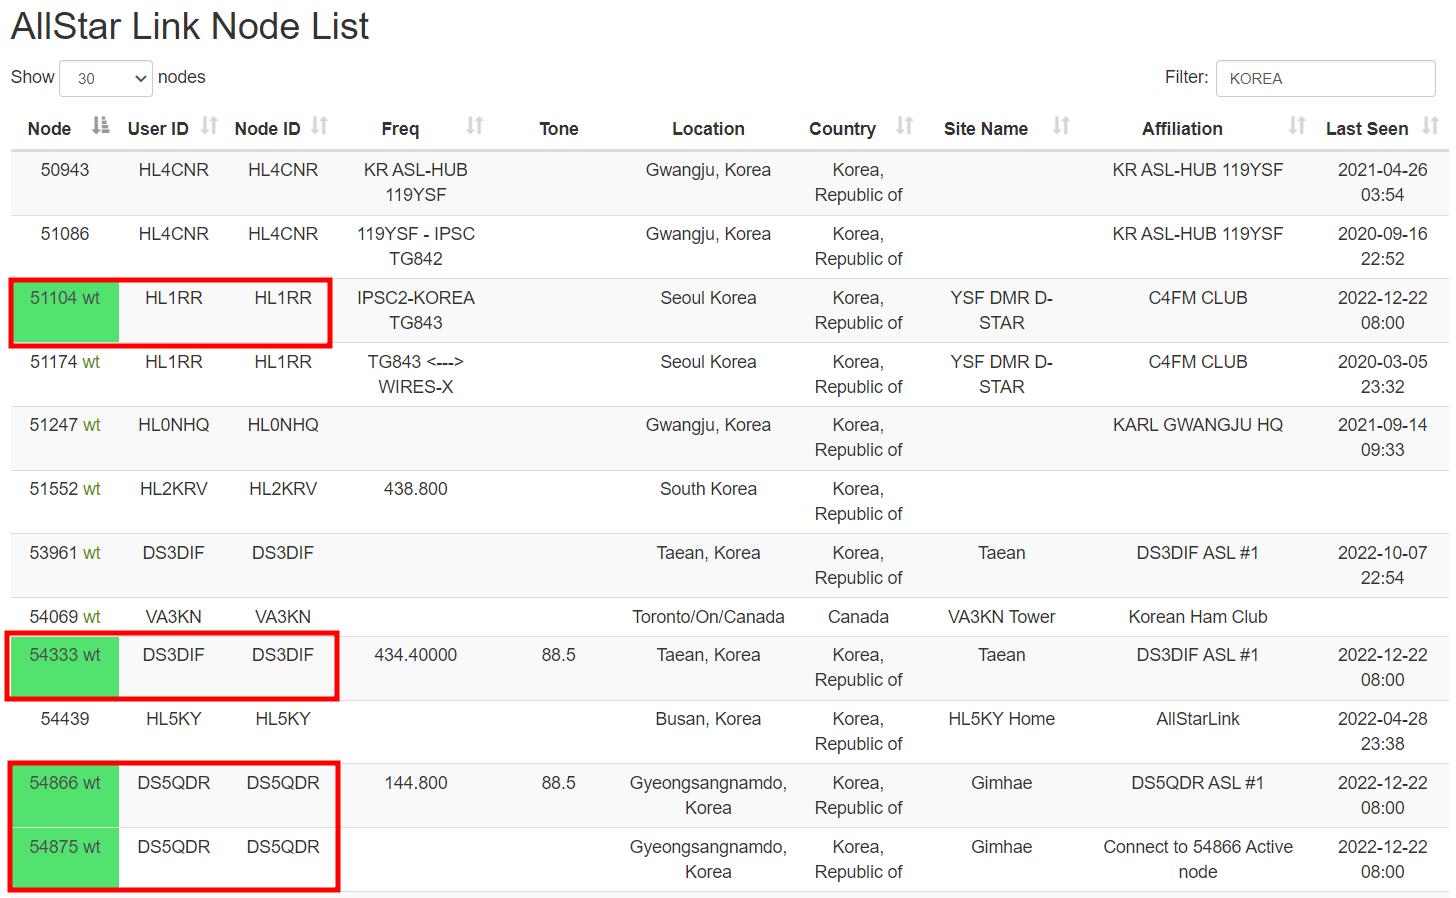
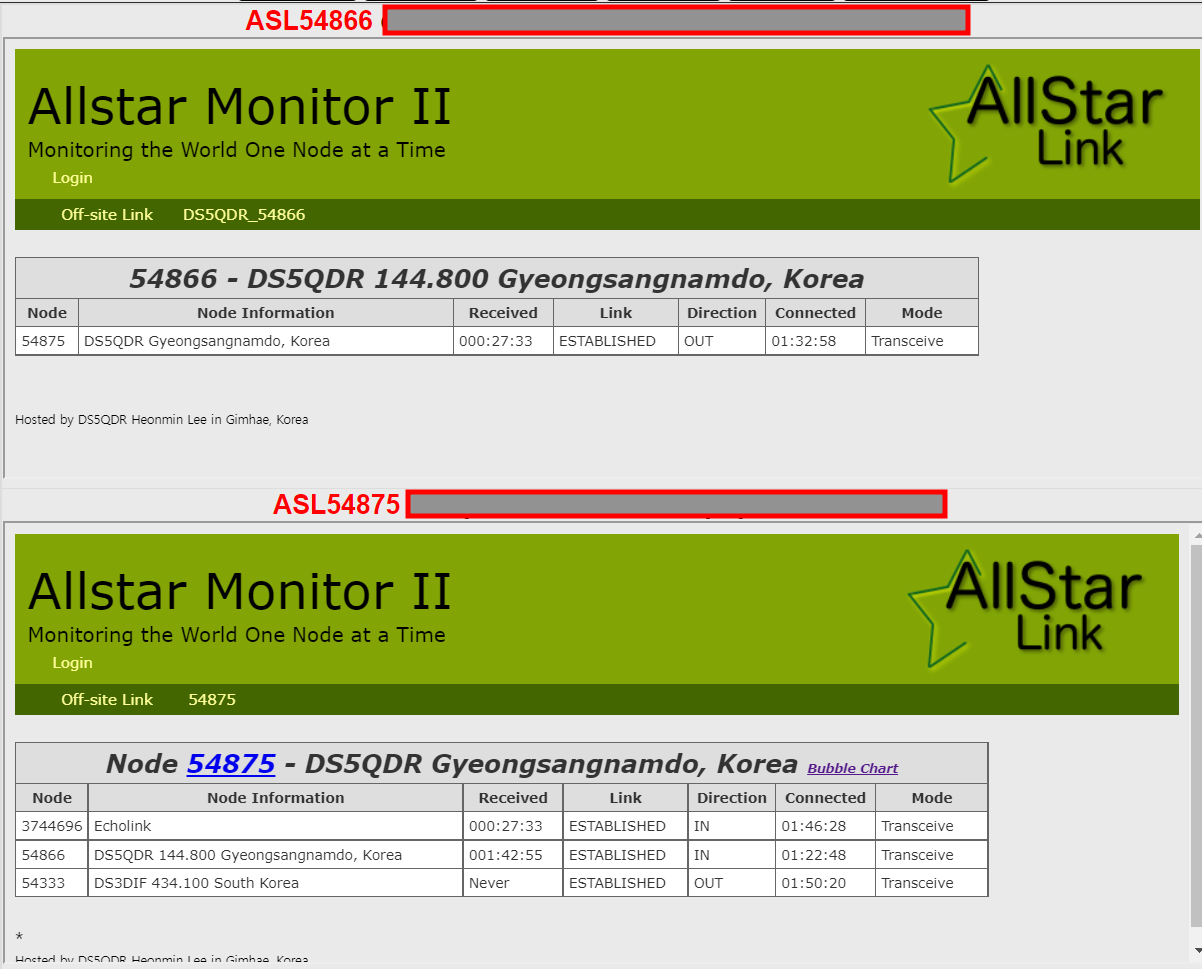
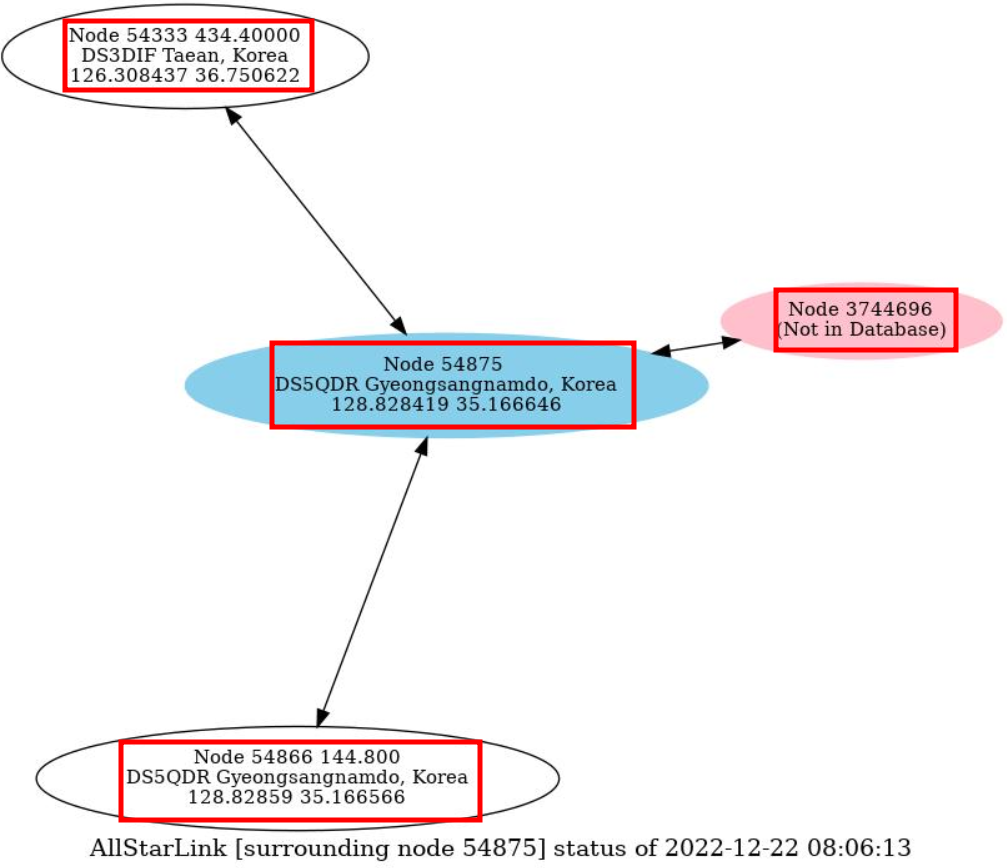
참고로 금일 기준 AllStarLink 국내 사용자는 아래와 같습니다
Allstar Monitor
Bubble Chart
감사합니다
DS5QDR 73!
'ASL SVX EchoLink' 카테고리의 다른 글
| 2023-02-21 ASL : AllScan AllStarLink Favorites Management & Scanning Web App (0) | 2023.02.21 |
|---|---|
| 2022-12-22 ASL : Terminology : Common Terms (0) | 2022.12.22 |
| 2022-10-29 ASL : Recommended software for AllStar Node and HTML Dashboard? (0) | 2022.10.29 |
| 2022-08-14 SVXlink : 연결 시 Greeting Message 변경 방법 (0) | 2022.08.14 |
| 2022-08-04 ASL : DVSwitch Mobile V2.x Beta Allstarlink WT mode 접속 방법 (0) | 2022.08.04 |
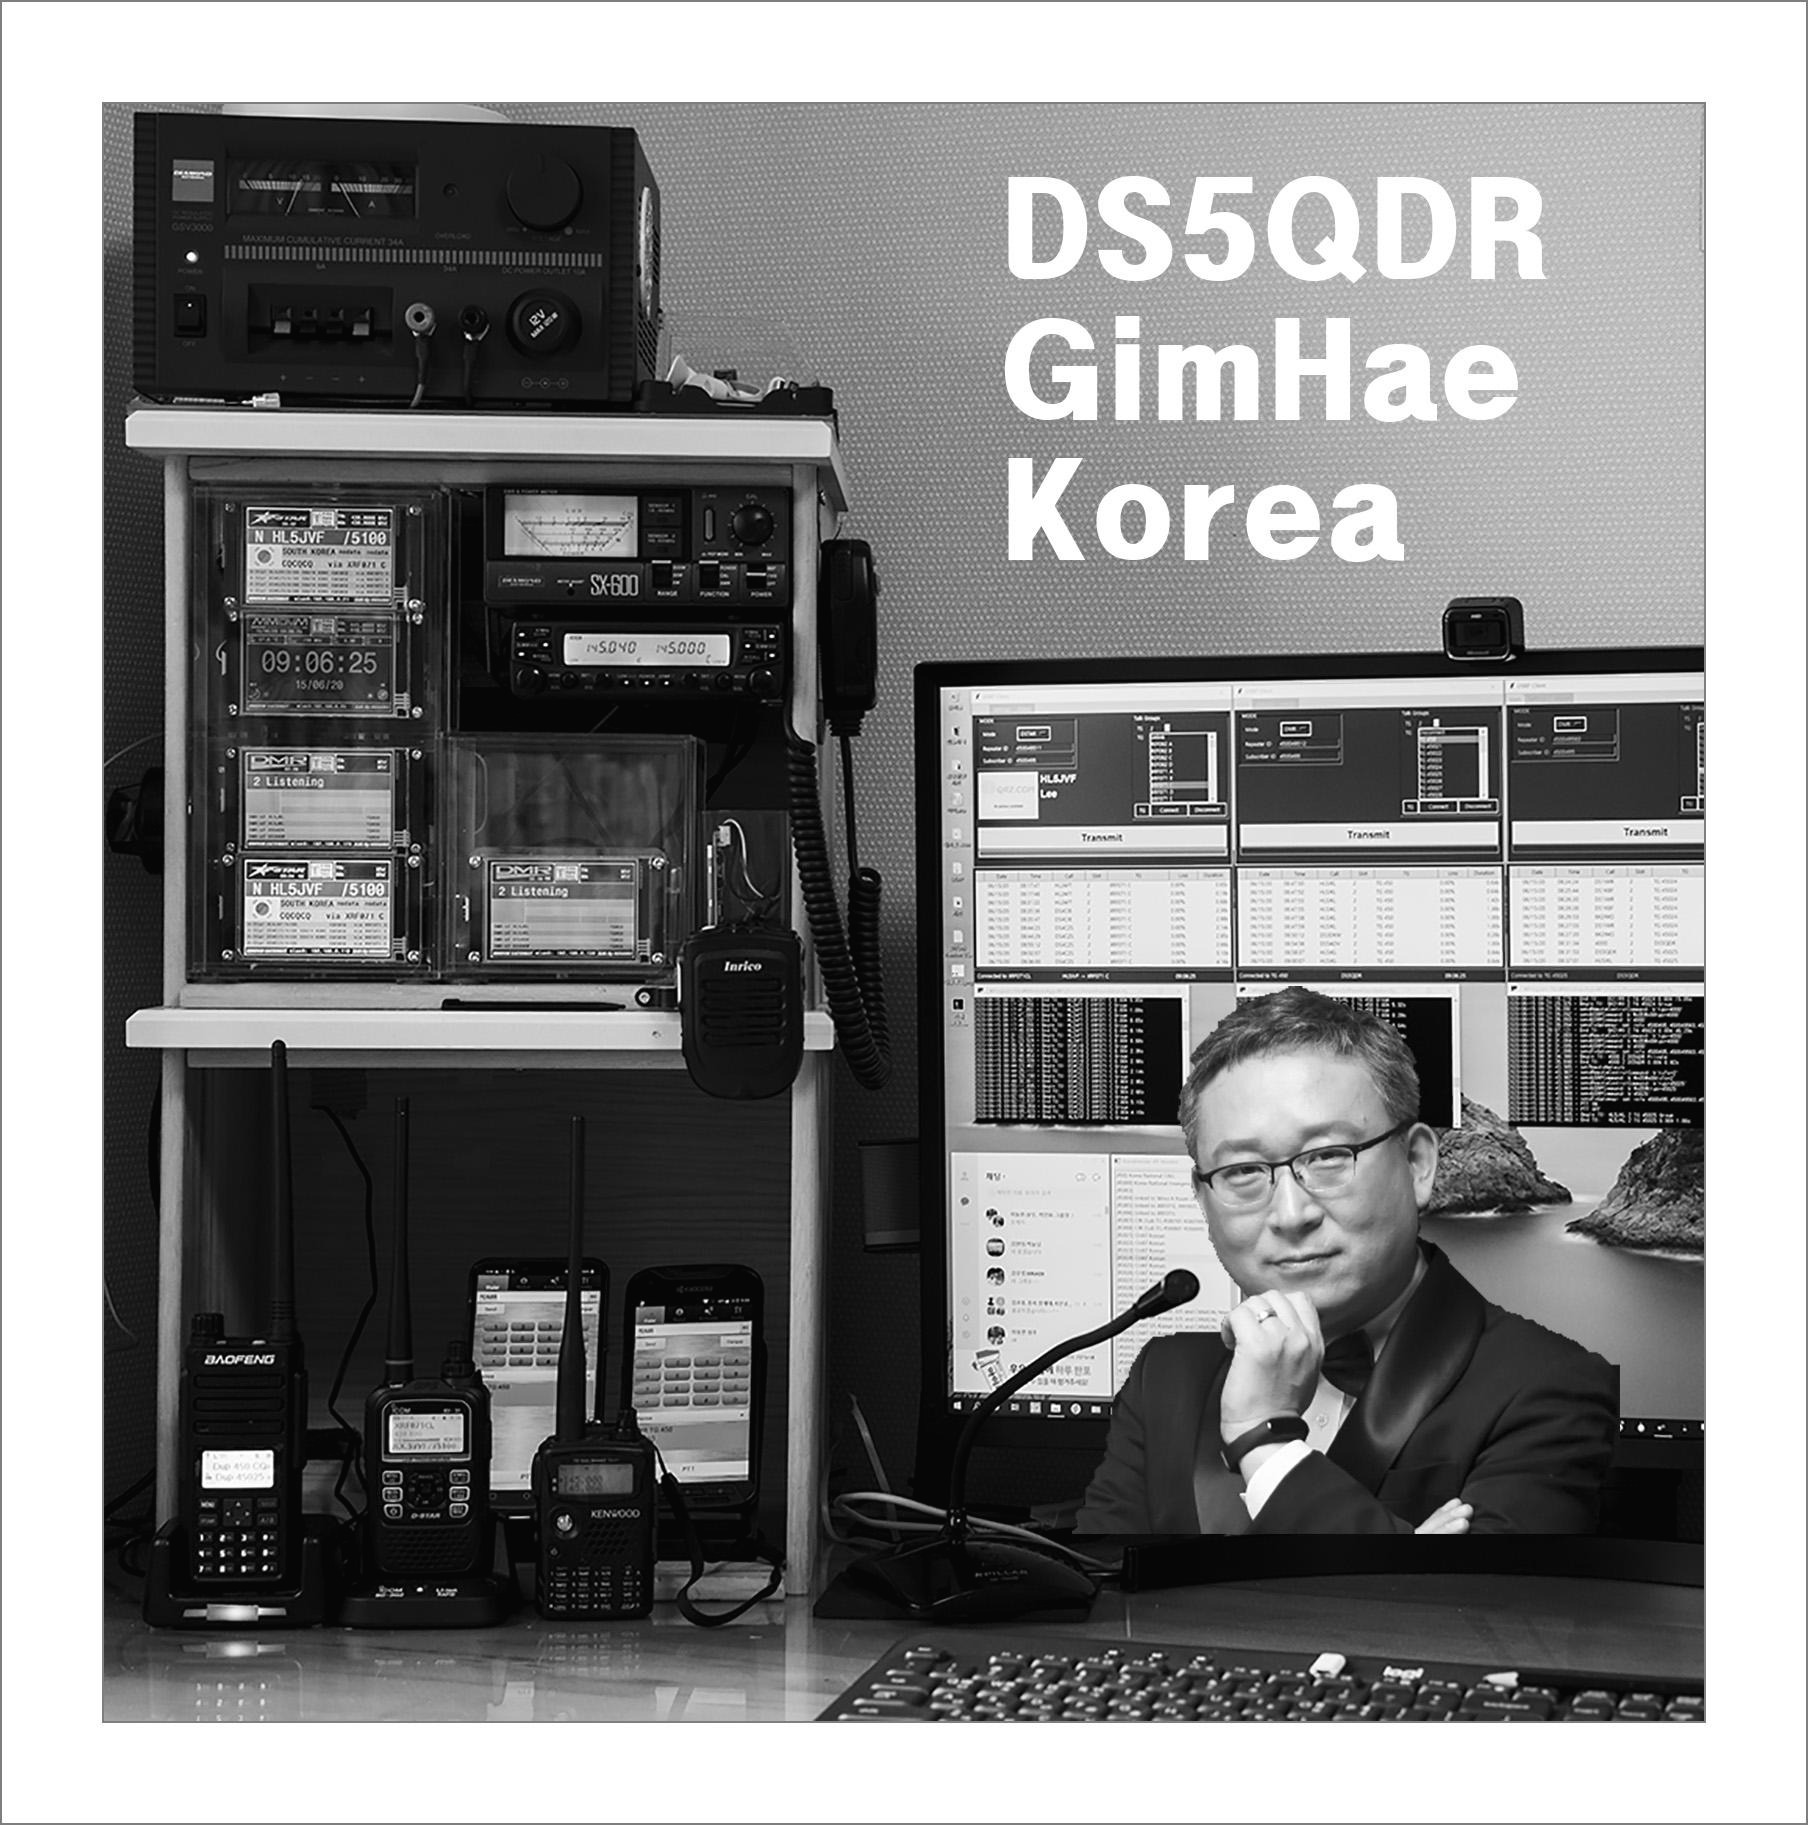
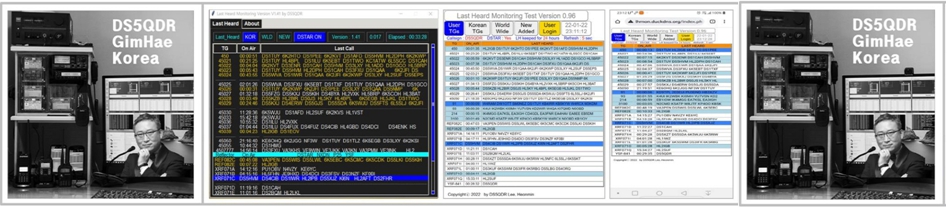
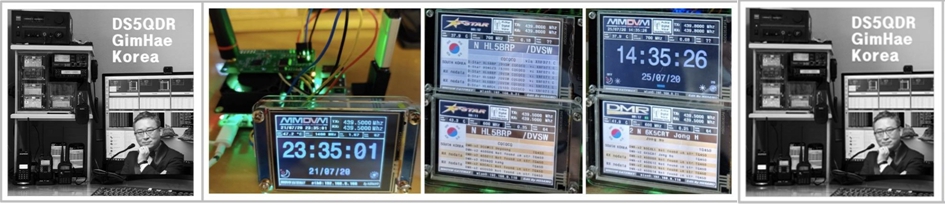
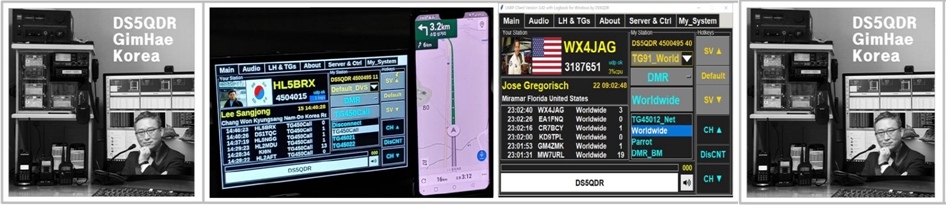
DS5QDR Heonmin Lee in Korea
DV 통신 경험 공유 Mode : DMR, DSTAR, YSF, XLX, YSF, M17, AllStarLink, EchoLink Software : DVSwich, USRP Client, Last Heard, MiniPi, MiniMT, VuMeter, DVPi, Pi-Star
